Turn Unifi Cloud Key Gen 2 + into a headless Linux Server
So – recently, I was given a Unifi Cloud Key Gen 2 + (If you dont know what this is, just google it). Seeing as I already had one to manage my Wifi AP’s, I figured I would give converting this into a linux machine to host some cool apps on for the house a shot. This is how I did it
Start with a clean slate
The first thing I would recommend doing is booting the cloud key into recovery mode, to do that:
1. Power off the unit
2. Remove power
3. Hold down the little reset button (use a pin or something)
4. Apply power and keep holding the reset button for 10 seconds or until the little screen on the front shows you that its in recovery mode. Once its in recovery mode it will show you the IP of the interface. Browse to it.
You should now find yourself at this screen:

5. Warning – the next steps will erase and factory reset your cloud key. If you want to use it further to manage your access points, you should probably stop here. You have been warned, back up your settings as well. If your ok with that part – click “RESET TO FACTORY DEFAULTS”. Once that is complete, click “CHOOSE” to upload the firmware from unifi (Im not sure why, but I had to use the 2.0.X firmware and let it upgrade when it came online. It wouldn’t take the 2.1.11 firmware at this step. (Download firmware here)
Once the firmware upload is complete, hit the “Reset factory defaults” button one more time, because – why not, and then click REBOOT.
6. Once your device restarts, browse to the IP displayed on the front of it.
7. At the URL to login to the cloud key, go through the normal first setup, but when you get to the “Update Schedule” set it for disabled, At the “Configuration” page, turn off Auto-Optimize and Send diags and then click finish.
8. If your on old firmware, (Like I am) your device will immediately update you to the latest firmware, let it.
9. Once its done updating – it will drop you at the Portal for the device, click the icon on the bottom that says “System Settings”, click Updates. I dont plan on using the “Network” and “Protect” functions outlined on this page. I am simply using this hardware as a linux machine. That being said, were going to remove both of these. Click the 3 dots above Network and click uninstall
(Follow the prompts and do the name for “Protect”

10. Make sure all options below that under Auto Update are turned off.
11. Click advanced and enable SSH (provide a password as well)
12. Putty to your device
13. The first thing we need to do is update the CURRENT installation. As of the time of this writting, the cloud keys had Debian 9 on them, were going to upgrade it to 10 but we need to get our base updated first. To do this, run the following commands one at a time
sudo apt-get update
sudo apt-get upgrade
sudo apt-get full-upgrade
sudo apt-get –purge autoremove
reboot
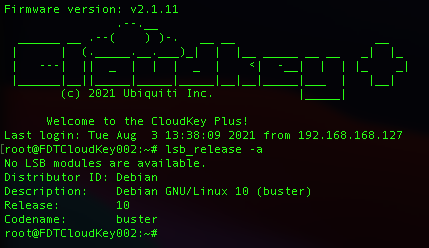
14. Once it reboots, you should now be at the latest build for your distro. In my case this was:

15. I like using WinSCP or CyberDuck to browse files, so install that if you dont hate yourself. (You deserve better than VI and were going to be editing some files so..)
16. Open WinSCP and browse to /etc/apt/sources.list and edit it. Were going to DELETE all the text in there, and replace it with :
deb http://deb.debian.org/debian buster main contrib non-free
deb-src http://deb.debian.org/debian buster main contrib non-free
deb http://security.debian.org/debian-security buster/updates main contrib
deb-src http://security.debian.org/debian-security buster/updates main contrib
17. Now were going to run through all the commands in step 13 again. You will get some prompts about updating components, and restarting services, answer yes to these. For the OPENSSH-SERVER, make sure you select “Keep the local version currently installed”, do NOT chose the maintainers version or you will not be able to SSH into the machine.


Thanks for writing this up! Your instructions worked flawlessly.
I wrote a piece of code to display information on the display and thought it might be useful or could could be referenced.
https://bitbucket.org/dskillin/cloudkey-g2-display/src/main/
I use a playful font for mine, and example of the output:
https://cdn.discordapp.com/attachments/869748801668284426/913640675889803294/out.png
Can you give a brief explanation on how to install this? Where should I put the script?
Great guide, however I wish to install Unifi to run a site, i tried a lot of different methods on how to do this on Debian 10, but it doesn’t work.
Have you tried this?
I havnt tried – but after you get the OS setup the way you want, you could return to the admin page of the cloud key and re-install the cloud key/wifi controller portion? Again – I have not tried this.
Hm I believe everything that has to do with Unifi is vanished after installing/upgrading to Debian 10. So I cannot access the portal again.
If you dist-upgrade, effectively removing all of the Unifi customisations, is it still possible to enter recovery mode to re-flash an official Unifi image later if needs be?
Yes. Great question. I did this the other day, when I sold the second unify cloud key I did this too. Finding the right image can be a bitch – I had to go WAY far back to get one to work.
Great article. Looking into your writing and comments and some questions raised:
1. Have you tried to flash a completely new OS. I see it is running on Debian, so maybe running a vanilla installation would be great if it is possible.
2. Alexander mentions flashing back stock Unifi FW that you confirmed worked with your device. How do you execute this? Information other than wining on the instability of the CK and working with the stock FW and software seems to be a bit limited. It’s probably not the friendliest hackable piece of hardware, but I really like it and plan to get one for fun, but not before I am sure about the above.
3. Is the 32GB eMMC where the above instructions work, or is it used only for recovery?
Welcome to Ubuntu 20.04.4 LTS (GNU/Linux 3.18.44-ubnt-qcom aarch64)
* Documentation: https://help.ubuntu.com
* Management: https://landscape.canonical.com
* Support: https://ubuntu.com/advantage
Linux ck-plus 3.18.44-ubnt-qcom #1 SMP Wed Oct 17 09:43:11 PDT 2018 aarch64
Firmware version: v0.8.6
The programs included with the Ubuntu system are free software;
the exact distribution terms for each program are described in the
individual files in /usr/share/doc/*/copyright.
Ubuntu comes with ABSOLUTELY NO WARRANTY, to the extent permitted by
applicable law.
.–.__
______ __ .–( ) )-. __ __ __
| | (._____.__.___)_| | |__ _____ __ __ _| |_
| —| || _ | | | _ | <| -__| | | |_ _|
|______|__||_____|_____|_____|__|__|_____|___ | |__|
(c) 2018 Ubiquiti Networks, Inc. |_____|
Welcome to the CloudKey Plus!
So, I have converted this Cloud Key Gen2 Plus from the original Debian system over to Ubuntu 20.04. It took a little work, and a few tries at the trouble shooting. I placed the following into a script, and used it to upgrade the UCK from Debian, back around to Ubuntu.
I know when you look at the script, the way the last upgrade went, your going to think, why do it this way. I will tell you a flat apt upgrade will leave you resetting the system back and starting again. However, *IF* you check apt upgrade, and upgrade ALL crypto packages first, you will have better success.
https://github.com/jmewing/uckp-gen2/blob/main/README.md
I got stuck on syslog-ng-core updates…
Preparing to unpack …/syslog-ng-core_3.19.1-5_arm64.deb …
Unpacking syslog-ng-core (3.19.1-5) over (3.8.1-10) …
dpkg: error processing archive /var/cache/apt/archives/syslog-ng-core_3.19.1-5_arm64.deb (–unpack):
trying to overwrite ‘/etc/logrotate.d/syslog-ng’, which is also in package cloudkey-plus-apq8053-base-files 2.4.38~691+g18016c6
dpkg-deb: error: paste subprocess was killed by signal (Broken pipe)
Errors were encountered while processing:
/var/cache/apt/archives/syslog-ng-core_3.19.1-5_arm64.deb
E: Sub-process /usr/bin/dpkg returned an error code (1)
It needed a little bit of help along the way!
dpkg -i –force-overwrite /var/cache/apt/archives/syslog-ng-core_3.19.1-5_arm64.deb
with a follow-up
apt –fix-broken install
THANK YOU SO MUCH for coming by here to provide that info. I will have another cloud key to test this process on in the coming weeks.
try
apt update
apt –fix-broken install
sudo dpkg -i –force-overwrite /var/cache/apt/archives/syslog-ng-core_3.19.1-5+deb10u1_arm64.deb
sudo apt -f install
it worked for me
The problem I have is fstab being overwritten when the device is restarted. Is it possible to get around this?
I’m wanting to solve the same problem. Did you ever figure out how to solve the fstab overwrite?
Hi Shaun, I have this problem too – fstab is restored on every reboot. Does anyone know how to get around this?
Thanks!